📟 Publishing a blog using Hugo
A no-nonsense opinionated guide to get your blog published using hugo, github, cloudflare pages and godaddy.
This publishing workflow is not meant for total beginners, but should be more of a hand-holding guide for someone:
- who knows how to work with Git and have a github/gitlab account.
- who are comfortable working with terminal commands rather than a GUI.
- who is comfortable writing blogs in markdown, i.e: if you know how Hugo works and you are okay with it.
- who can navigate around web to figure out stuff, especially if something goes wrong you should be able to google and fix it.
If you would rather prefer a more straightforward & less involved way to blog, consider bear blog instead.
Index :
- Step 1 : Setting up Hugo
- Step 2 : Writing your first post
- Step 3 : Pushing to Github
- Step 4 : Publishing using Cloudflare Pages
- Step 5 (Optional) : Setting up custom domain
Step 1 : Setting up Hugo
- Install Hugo : Mac | Windows | Linux
- Install Git : Mac | Windows | Linux
- Check if hugo is installed properly by running :
hugo version - Choose a project folder, usually documents folder works :
# Mac / Linux mkdir ~/Documents/Projects/; cd ~/Documents/Projects/ # Windows mkdir %USERPROFILE%\Documents\Projects & cd %USERPROFILE%\Documents\Projects - Choose a project name (for a personal blog something like
<your-name>-blogjust works) and run -hugo new site <your-name>-blog. - A new directory would be created, step into that :
# Mac / Linux cd ~/Documents/Projects/<your-name>-blog # Windows cd %USERPROFILE%\Documents\Projects<your-name>-blog - Initialize git repository :
git init
Theming
- Choose a theme from - themes.gohugo.io (e.g: this blog uses hugo-bearblog)
- Go to git repository of that theme using download button -

- Now there are 2 ways to use this in your blog [?] -
- Simple but sometimes restrictive - directly add above git project as a submodule :
git submodule add https://github.com/janraasch/hugo-bearblog.git. - (recommended) Slight maintainance overhead but highly customizable -
- Fork the project :

- Add forked project as a submodule :
git submodule add https://github.com/gauthamchettiar/hugo-bearblog.git
- Fork the project :
- Simple but sometimes restrictive - directly add above git project as a submodule :
- Add above theme to hugo.toml -
echo "theme = 'hugo-bearblog'" >> hugo.toml
Step 2 : Writing your first post
- Run below command to create a new post (⚠️ this is dependent on theme implementation, check theme specific README first) -
hugo new blog/<post-subject>.md - A new markdown file would be created at -
content/blog/<post-subject>.md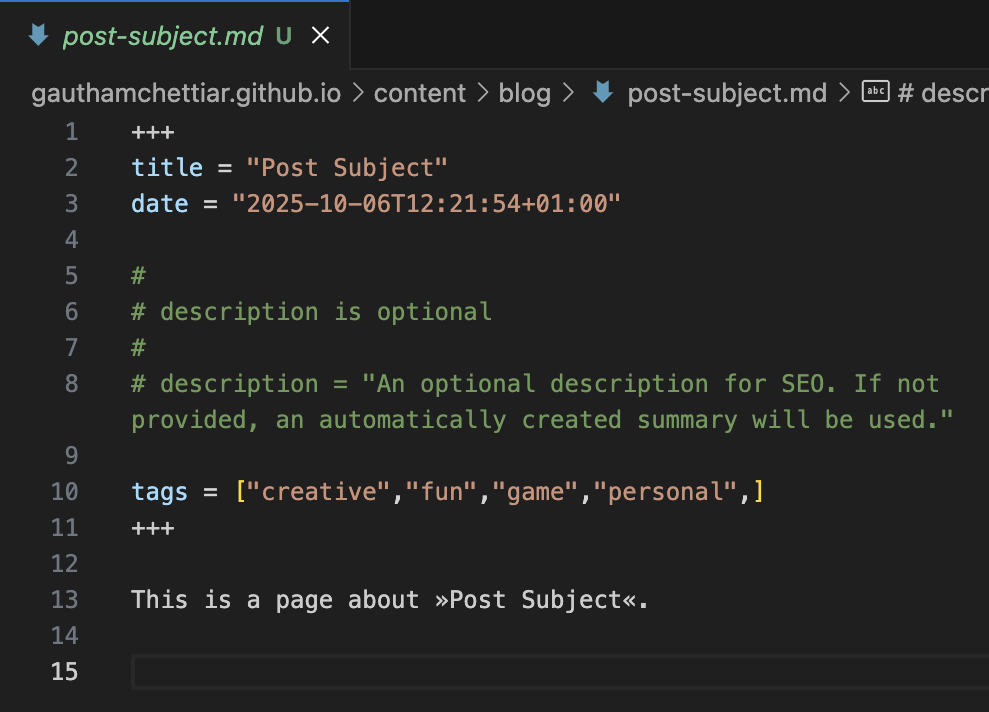 Again, your file might look slightly different based on theme you choose.
 - Edit this markdown file to include your post content.
- Preview your blog locally :
hugo server -D - Go to web server link provided in output, usually http://localhost:1313/ :
... Built in 72 ms Environment: "development" Serving pages from disk Running in Fast Render Mode. For full rebuilds on change: hugo server --disableFastRender Web Server is available at http://localhost:1313/ (bind address 127.0.0.1) Press Ctrl+C to stop - You should be able to preview your web page here. Also, this would be auto-updated every time you make changes to your markdown file and save it :
    ...
    Change detected, rebuilding site (#36).
    2025-10-06 13:43:53.971 +0100
    Source changed /blog/20251106_publishing_using_hugo.md
    Web Server is available at http://localhost:1313/ (bind address 127.0.0.1)
    Total in 4 ms
Step 3 : Pushing to Github
- Create a new repository on github.
- Copy
<github-project-url>from above created project : e.g https://github.com/gauthamchettiar/gauthamchettiar.github.io - Run below set of commands from your hugo blog directory :
1git add .
2git commit -m "Initial commit"
3git branch -M main
4git remote add origin <github-project-url> # replace with copied URL
5git push -u origin main
Step 4 : Publishing using Cloudflare Pages
- Signup for Cloudflare Pages account, if you have not done it yet.
- Search for “Workers & Pages”, and go to that page :
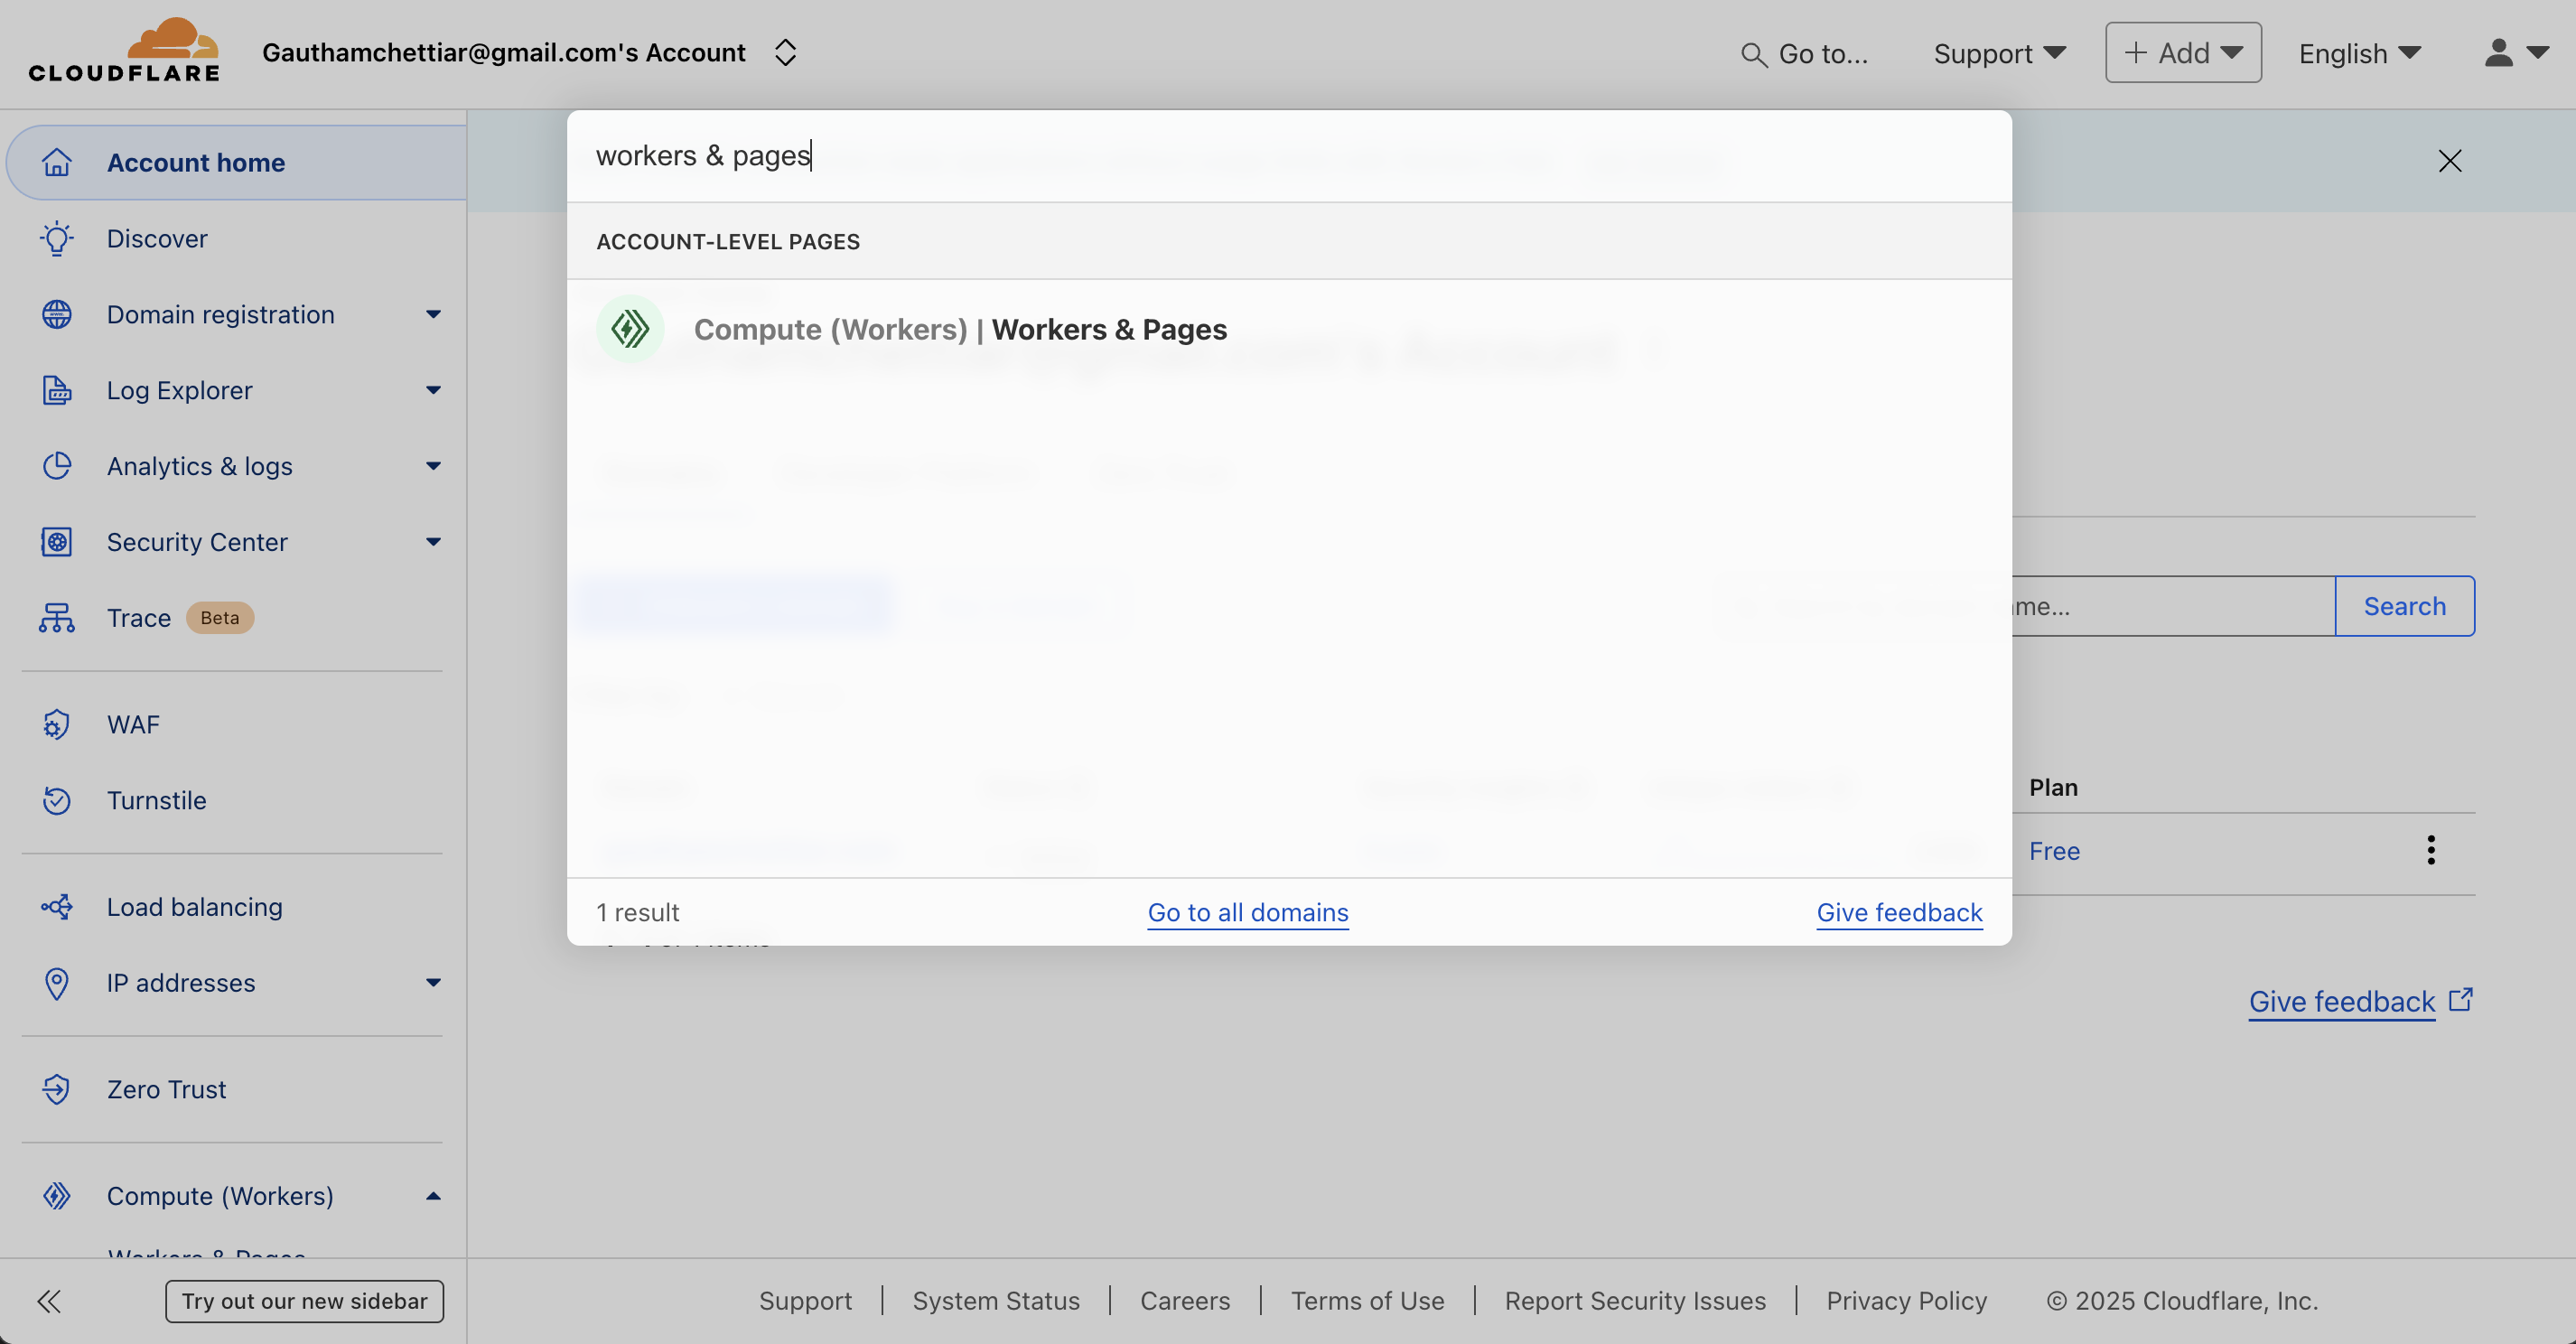 As of writing this post, this is at Compute (Workers) > Workers & Pages
 - Click on “Create Application” :

- Select repository :
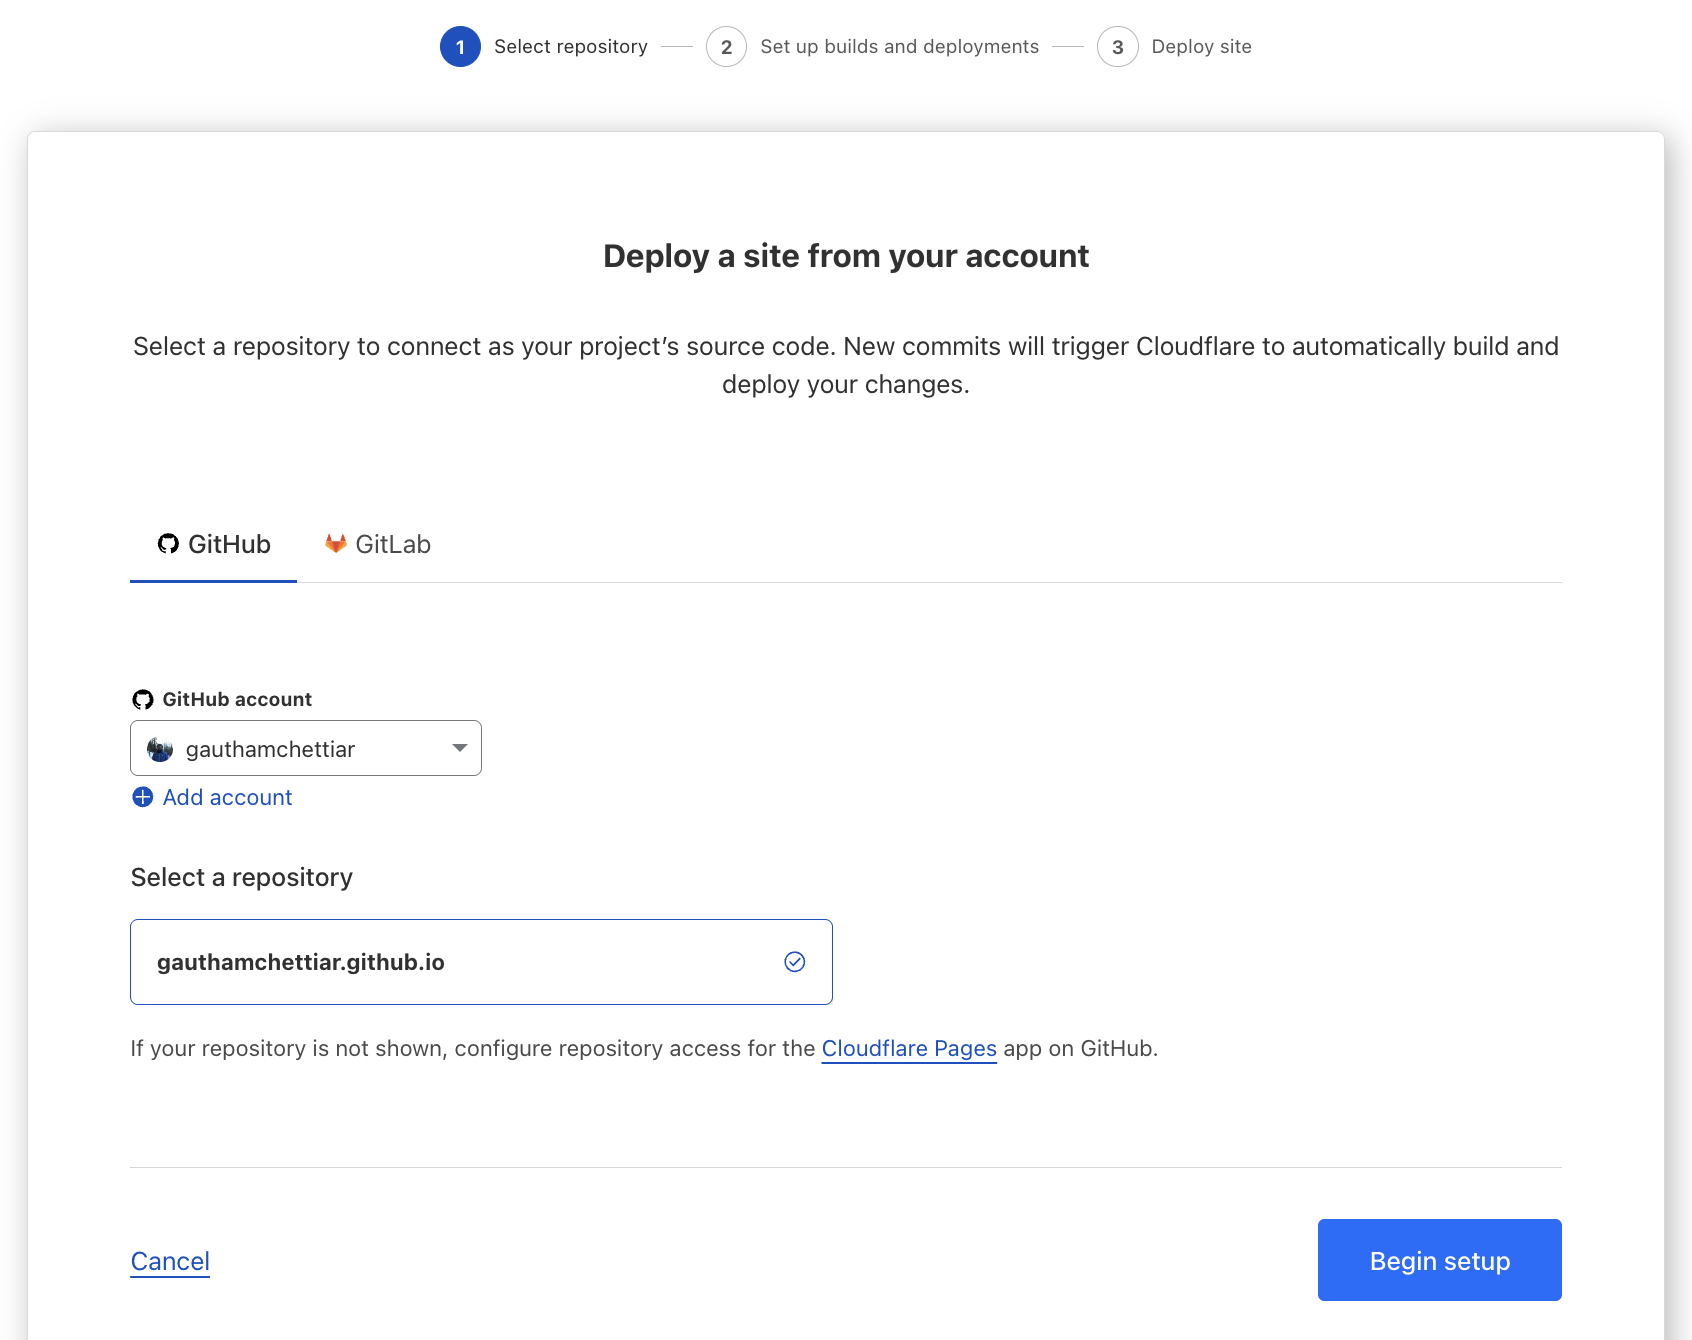
- Link your github account to cloudflare pages using “Add Account”, then
- Choose the repository where hugo blog is pushed to, and
- Click on “Begin Setup”.
- Setup builds and deployments:
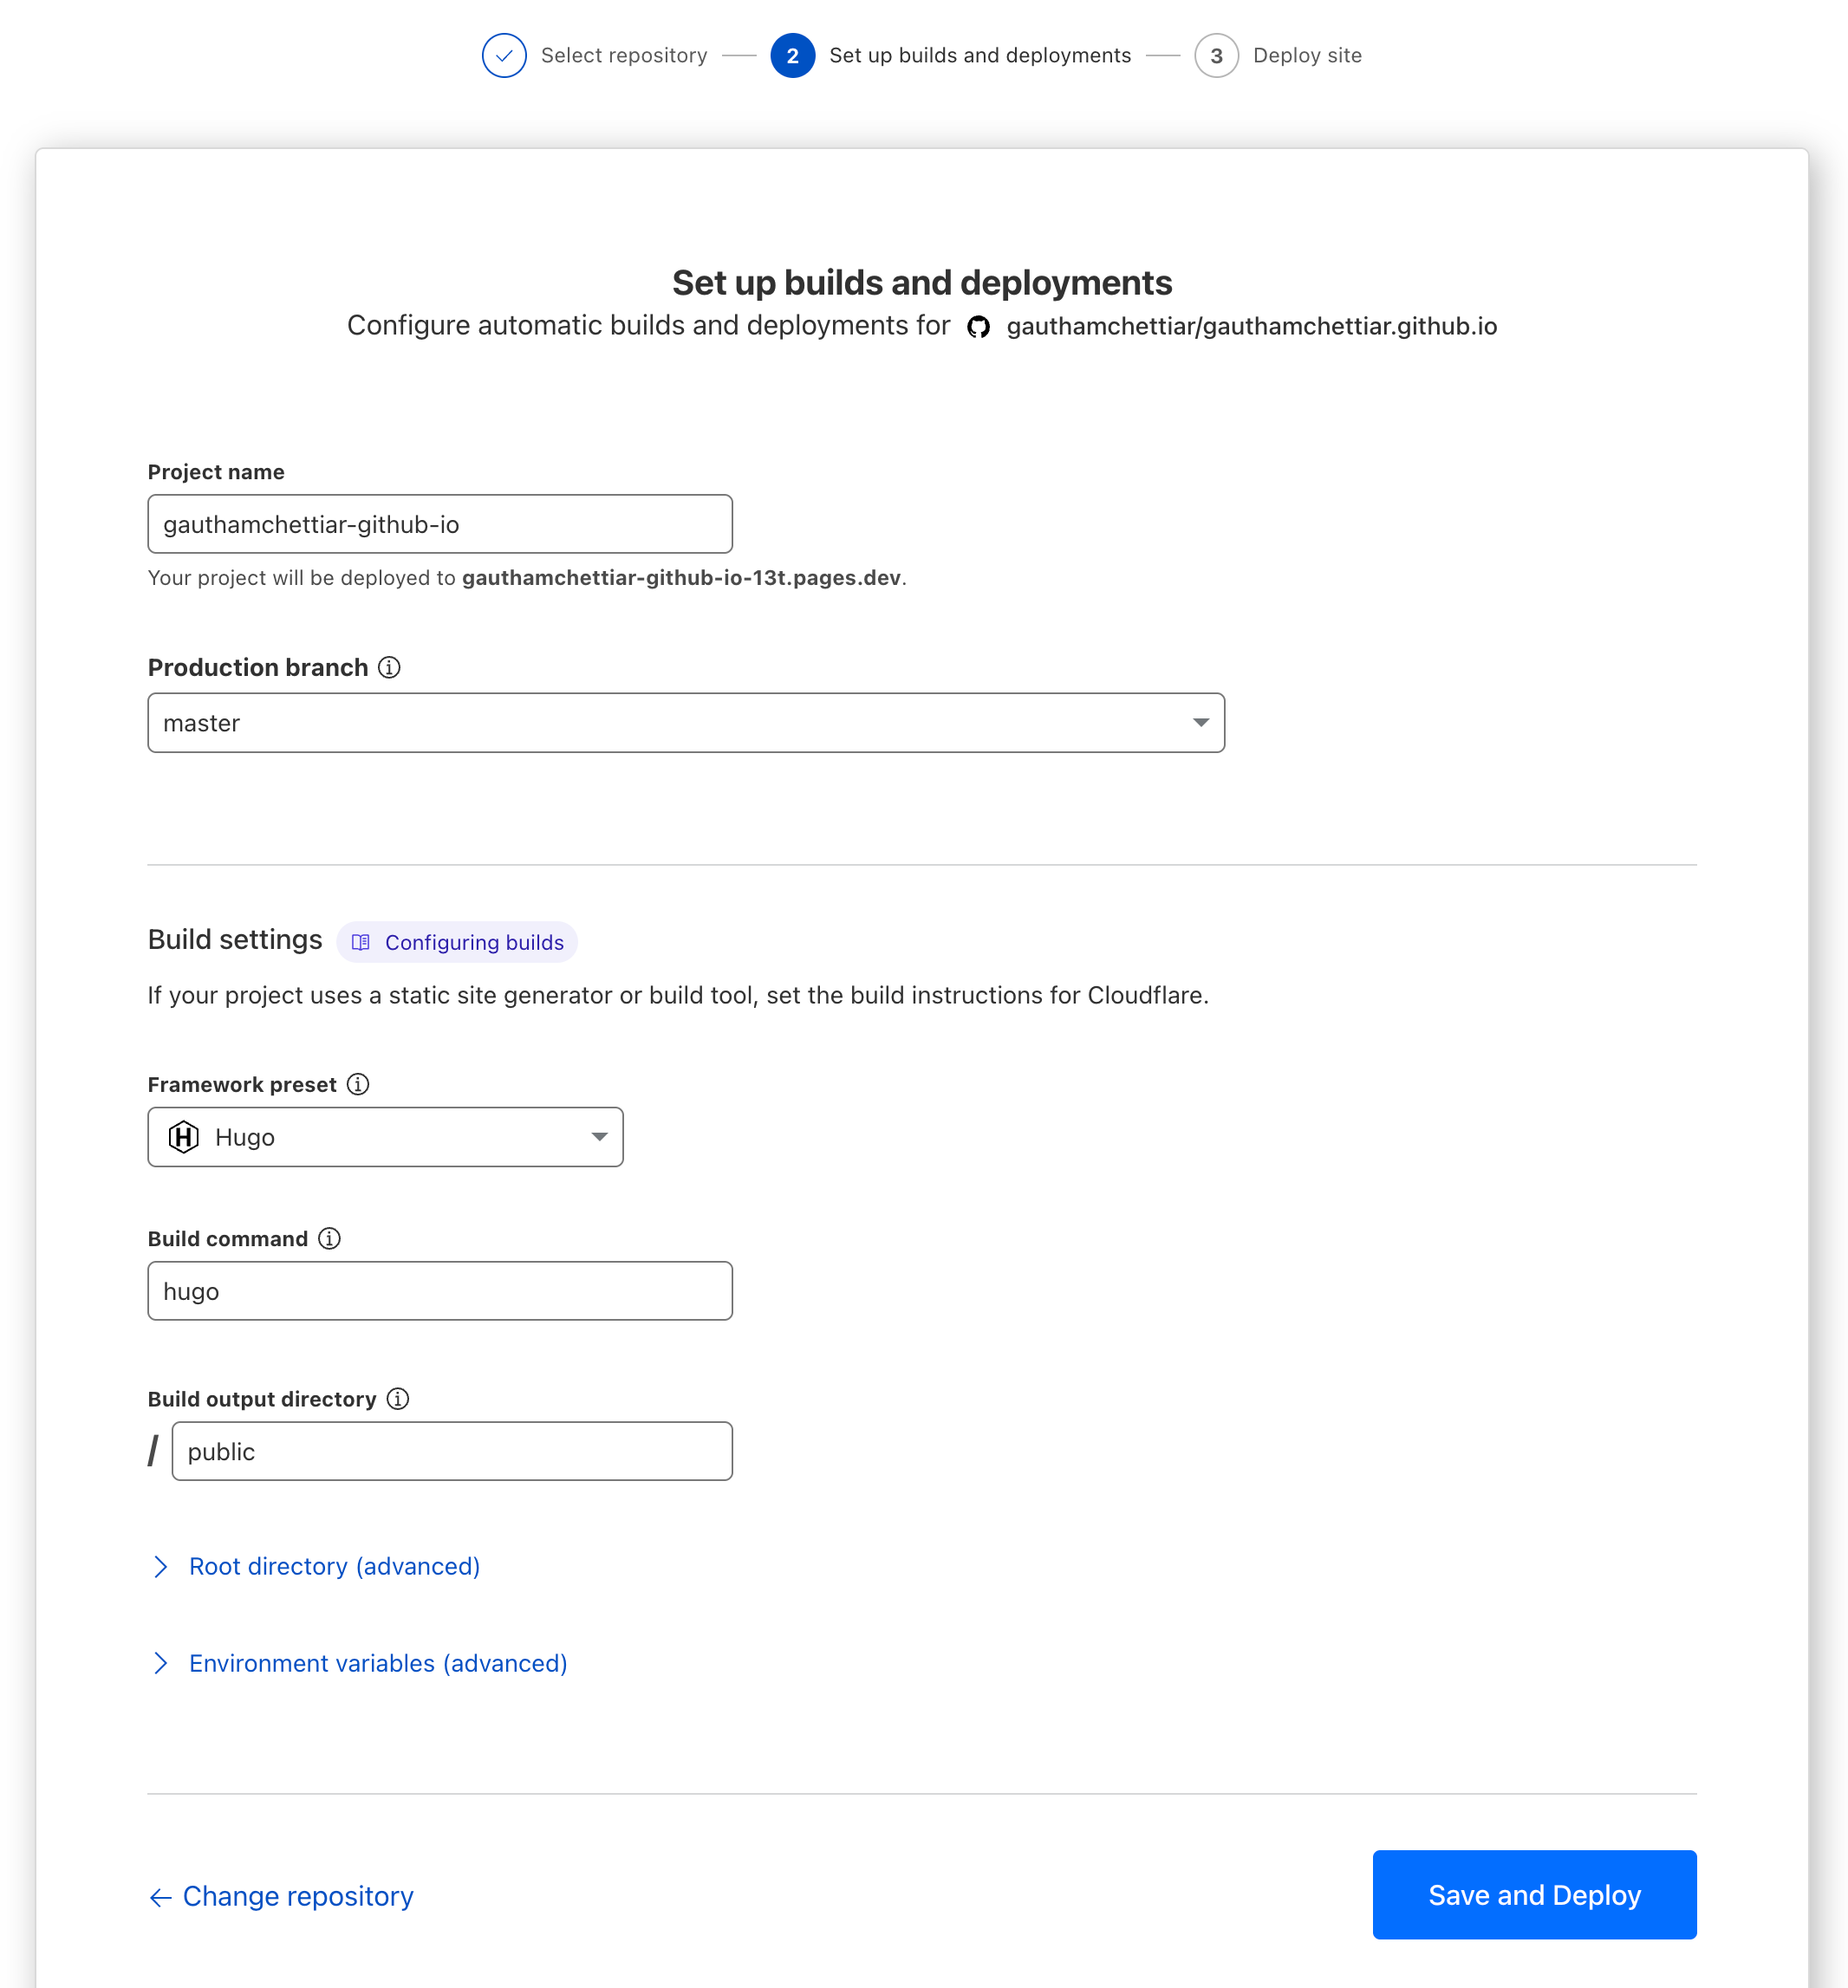
- Choose a name for your project, this will be deployed as:
https://<project-name>.pages.dev - Choose “Production branch” as “master”, then
- Choose “Framework Preset” as “Hugo”, and
- Click on “Save and Deploy”
- Choose a name for your project, this will be deployed as:
- Your deployment would finish and you would be given a link where your app is deployed :

- This is a WWW link that you can immediately start sharing with everyone.
Step 5 (Optional) : Setting up custom domain
While this is not required, it’s nice to have a permanent address on internet.
- HARDEST PART come up with a good domain name for your blog, I choose to keep my actual name as domain.
- Buy a domain on GoDaddy, or any website where you find registration and renewal options to be cheapest.
- Go back to cloudflare “Workers & Pages” > “Custom Domain” > “Set up a custom domain” :
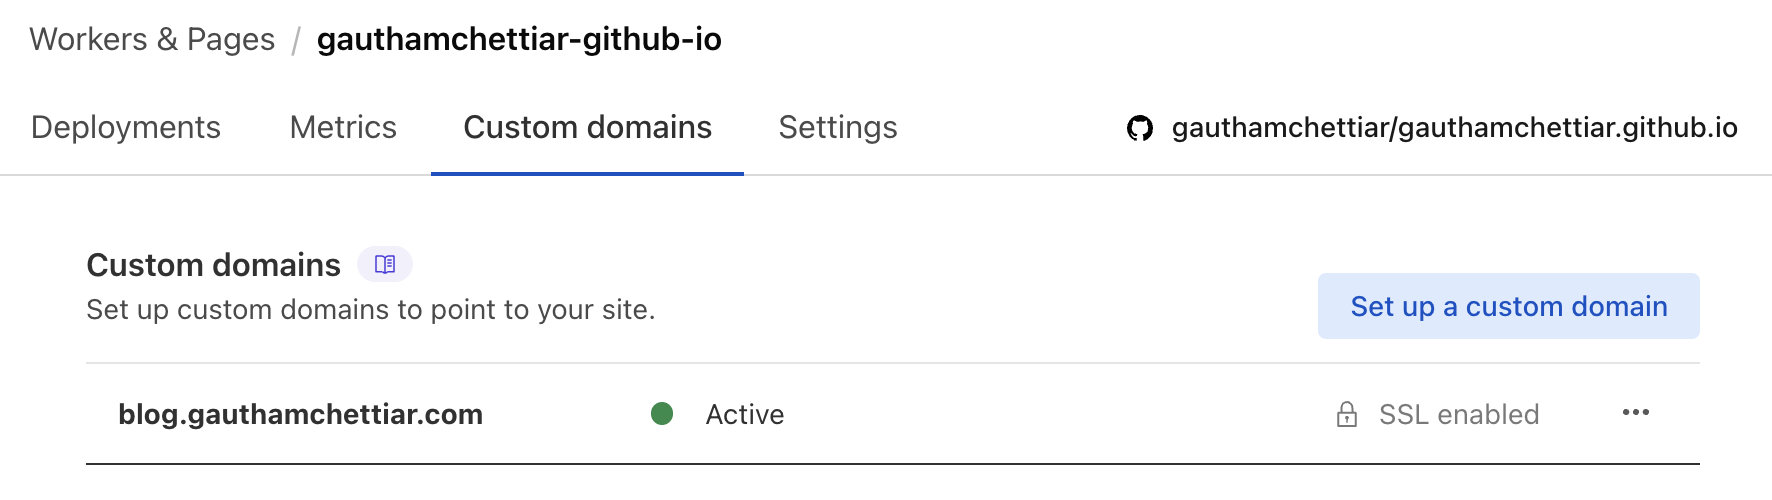
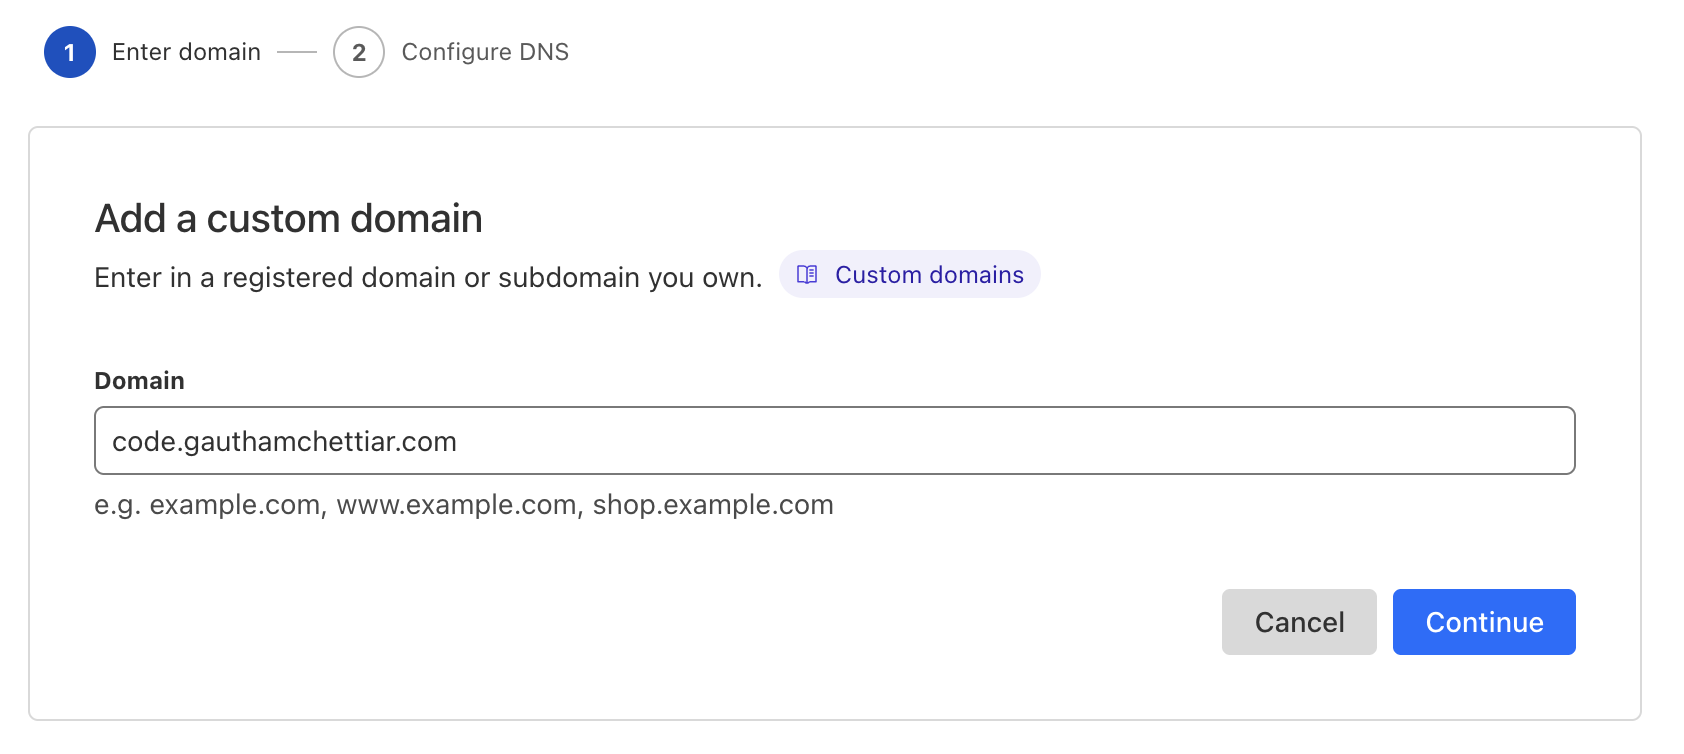
- Add a domain, it could include a subdomain (blog.yourdomain.com) if you wish:
- Once you click on “Activate domain” it would add your record to it’s DNS.
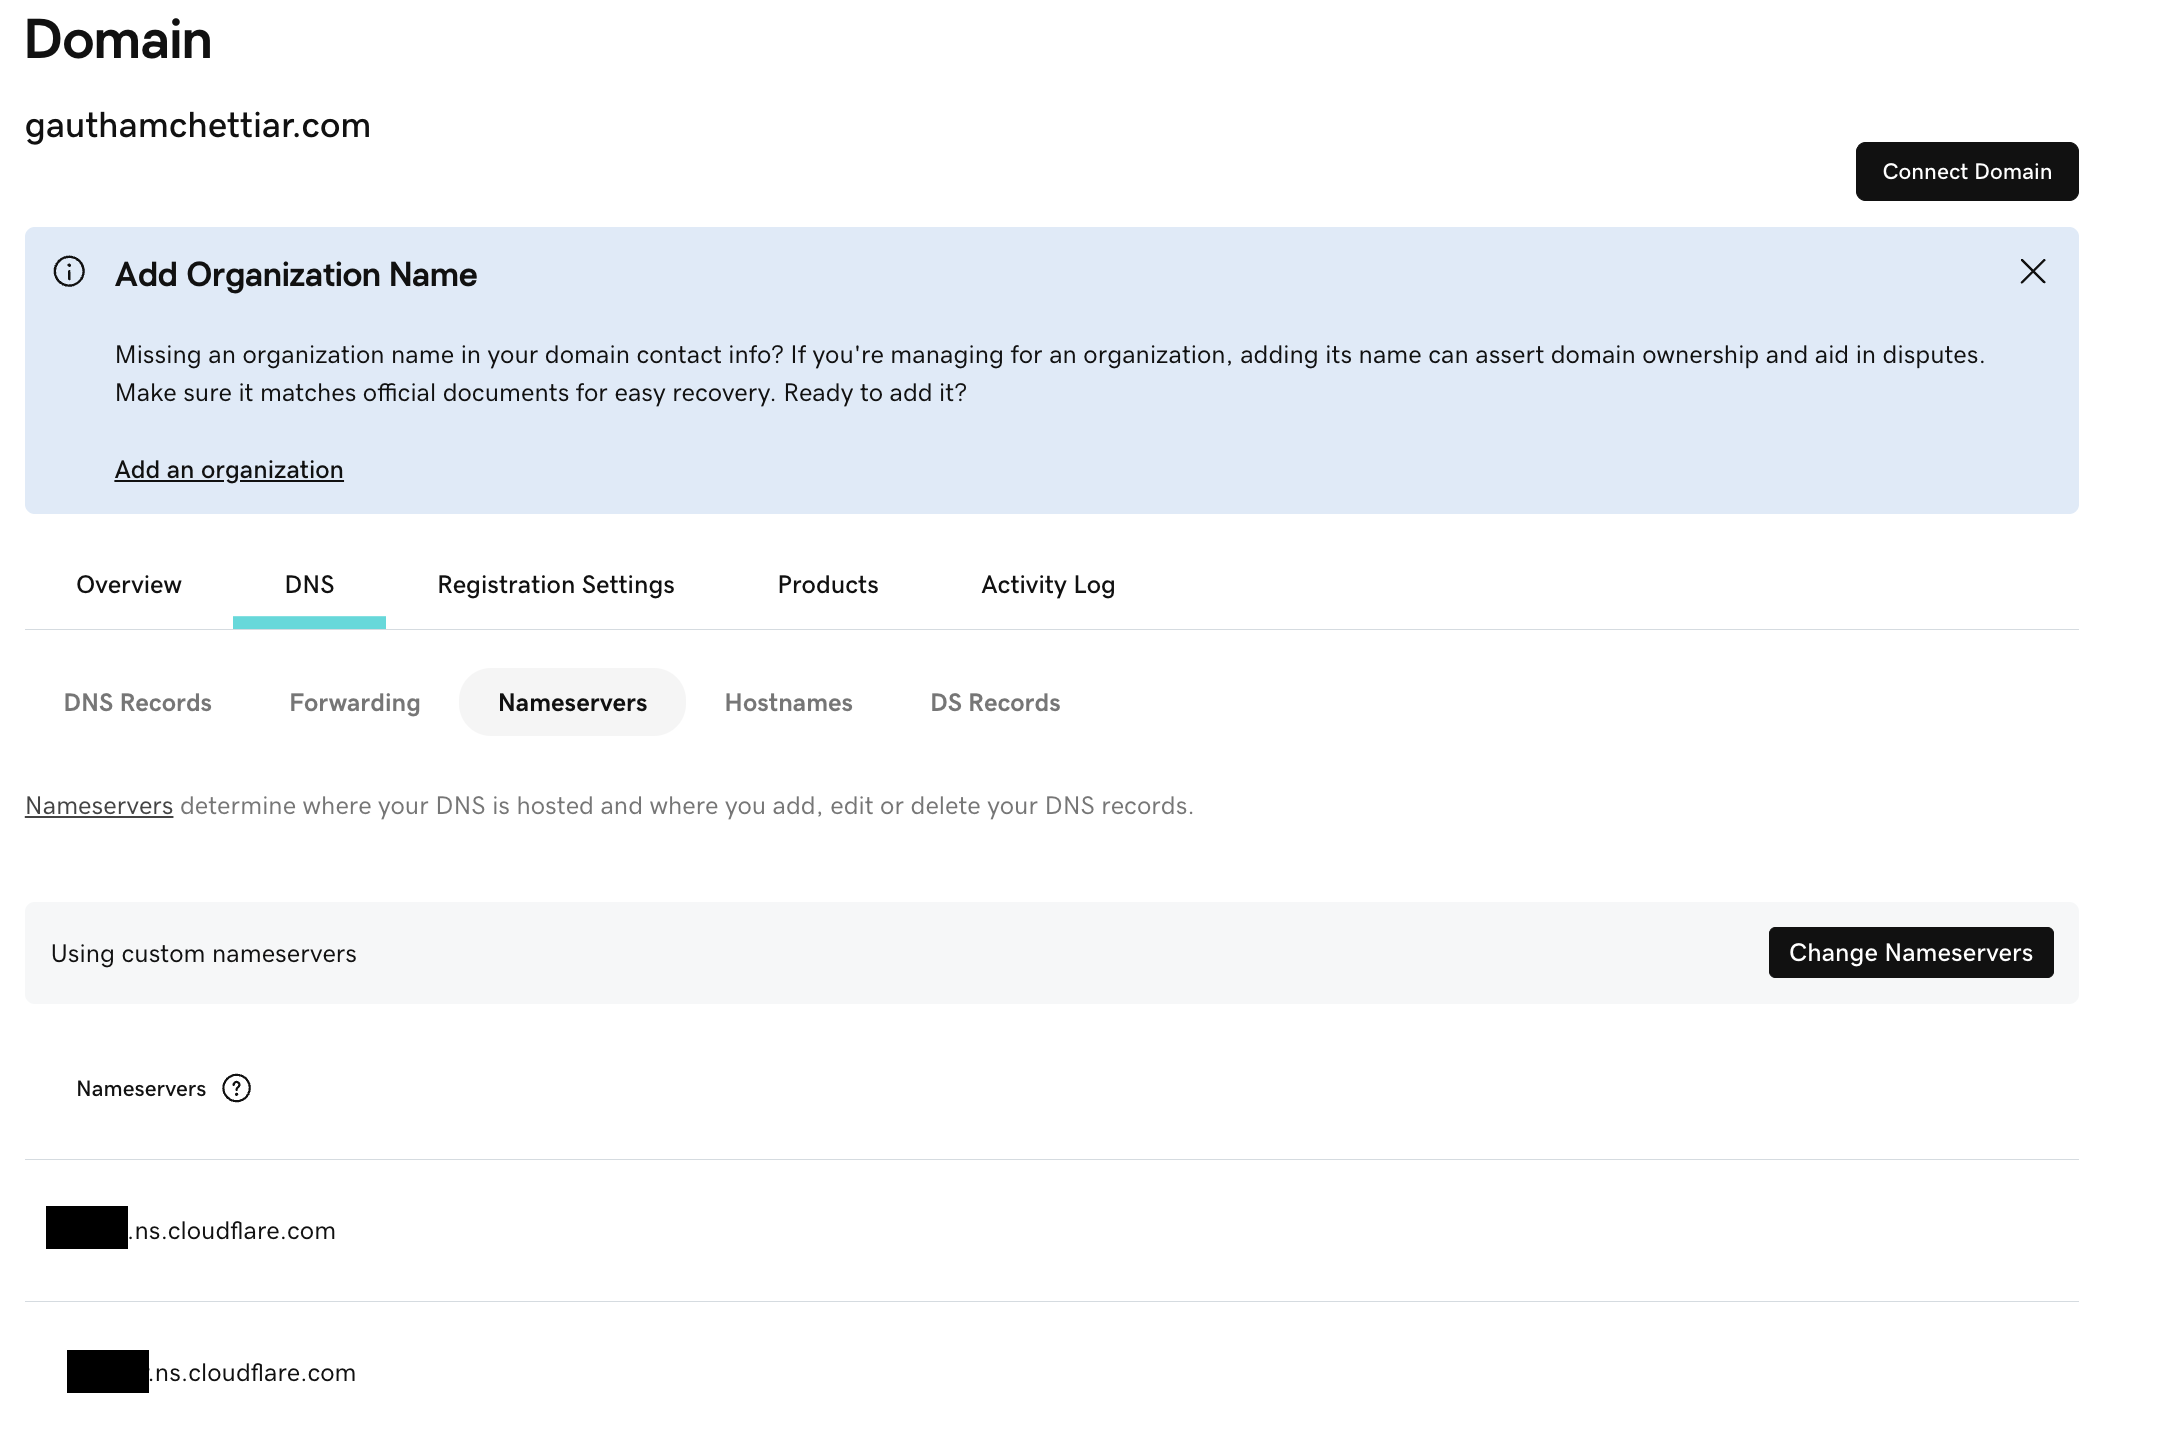
- In order for cloudflare to manage DNS records, you need to add nameservers displayed in cloudflare to GoDaddy :
- It could take upto 24 hours for entire thing to be up and running!
Aaaaand, That’s it!